How to Install Laminate Flooring
Published by TradeIQ · Updated
Laminate is the floor most people try first, and the click-lock joint really is friendly to beginners. But almost everything you need to know how to install laminate flooring correctly happens before the first plank goes down. Here is the honest version, including the places where the biggest manufacturers give you different numbers for the same question.
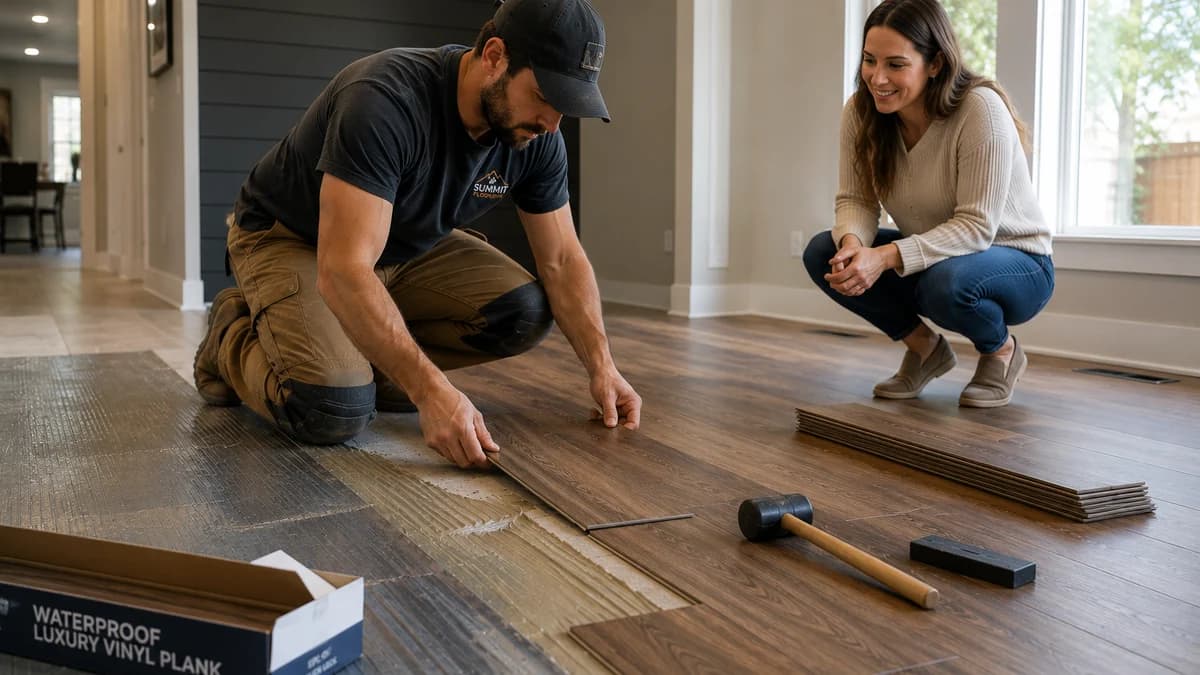
Key takeaways
- The manufacturers genuinely disagree. Expansion gaps run from 1/4 to 1/2 inch and stagger from 6 to 16 inches, so use the sheet that came in your box.
- Mohawk, Quick-Step, and Pergo Pro let you skip acclimation only if the storage space and the room are within 25 degrees and 20% humidity of each other. Not 60 degrees. A cold garage blows past it. Shaw asks for no acclimation at all; plain Pergo wants 48 hours, or 96 in a dry or humid climate.
- Laminate floats, so it copies the subfloor. Bruce, Pergo, Mohawk, and Quick-Step all print 3/16 inch over 10 feet, but no association sets that number, so read your own sheet.
- Over concrete, lay a 6 mil poly vapor barrier and take an actual moisture reading. Only Pergo, Mohawk, and Quick-Step specify virgin resin and an 8 inch overlap; Bruce does not.
- The brands do not even agree on room humidity. Most want 35% to 65%. Bruce wants 30% to 50%.
- Direction is mostly aesthetic. Shaw calls it purely a personal choice, though Bruce does ask you to run perpendicular to the joists, and nobody publishes a structural reason for that on a floating floor.
- Never strike the plank face with a mallet. The mallet drives the tapping block.
Can a beginner install laminate flooring?
Yes, usually. Clicking planks together is genuinely the easy part, and a careful first-timer gets a good result in a normal bedroom or living room.
The hard part is what’s underneath. Working installers keep saying the same thing: laminate complaints almost always trace back to subfloor flatness, moisture, or locking joints that got stressed during install. None of those are about skill with a saw. They’re about prep and patience. Lowe’s own installation video rates the job “moderate” and tells you to hire somebody if you aren’t fully confident, which is a fair call from a company that would rather sell you the boxes.
The install, start to finish
Here is the whole job in order. Everything after this section is the detail that decides whether the floor survives its first change of season, and you will want the flatness and expansion gap parts before you commit, but this is the shape of the day.
- 1Undercut the door casings first, before any flooring goes down.
- 2Roll out your vapor barrier or underlayment, seams overlapped per the instructions.
- 3Set spacers along the starting wall to hold the expansion gap.
- 4Lay the first row with the groove side facing the wall, checking it dead straight against a chalk line. The whole floor inherits this row.
- 5Start row two with a cut plank so the end joints land well away from row one.
- 6Work across the room, tapping joints closed with the tapping block, never striking the plank face.
- 7Use the pull bar for the last plank in each row, where the block won’t fit.
- 8Cut the final row lengthwise, remembering to hold the expansion gap at the far wall.
- 9Pull every spacer, then install baseboard or shoe molding so it covers the gap without pinching the floor.
Simple enough on paper. What separates a floor with closed joints a few winters from now from one that peaks in the hallway is everything below, and it begins with a warning that shapes this whole guide. There is no single right answer for the expansion gap, the stagger, or how long to acclimate. Pergo, Shaw, Mohawk, and Bruce all publish different figures. Every page you find on this topic quotes one brand’s number as if it were universal, usually the brand that page is selling. We don’t sell laminate, so we can just show you the disagreement and tell you the only rule that always holds: the installation sheet in your box beats anything on the internet, including us.
The numbers your brand uses are not the numbers mine uses
This is the single most useful thing on this page. Here is what the actual installation documents say about the perimeter expansion gap:
- Bruce and Hartco (AHF TimberTru locking system): 1/4 inch
- Pergo: 3/8 inch
- Mohawk RevWood Plus: 3/8 inch
- Quick-Step Studio: 3/8 inch
- Swiss Krono USA: 3/8 inch, though that comes from its learning center rather than an installation sheet
- Shaw: its general laminate page says 1/2 inch, while the glueless laminate sheet we could pull says 1/4 inch
That is a spread of double, from 1/4 inch to 1/2 inch, and Shaw manages to span the entire range by itself. Stagger runs the same way. Mohawk RevWood wants a 6 inch minimum end joint offset. Quick-Step wants 12. Shaw wants 12 to 16. Bruce says 12 inches in the floating-floor section of its document and 16 inches in the glue-down section, so read the section that matches how you are actually laying it.
So find your product’s installation sheet, the one in the box or on the maker’s site, and use its numbers. Guess instead, and you’re guessing with your warranty too, because a maker can refuse a claim on a floor that went down outside its own written spec.
Tools you’ll need to install laminate flooring
- Spacers for the perimeter gap, and a tapping block and pull bar sized for your locking system
- A saw: a miter saw or table saw, or a laminate cutter if you want quiet and no dust
- An oscillating multi-tool or a jamb saw, for undercutting door casings
- A moisture meter, if any part of this floor sits on concrete
- A long straightedge or an 8 foot level, plus a chalk line and a tape measure
- 100% silicone caulk, for sealing at toilets and other wet spots
The mallet drives the block, never the plank
Bruce prints this in capital letters: striking the surface with a rubber mallet may burn the finish and cause irreparable damage. Read the whole document though, because Bruce also lists a rubber mallet among the tools you need, and that all-caps warning sits in its glue-down section. The two are not actually in conflict once you see what is meant. The mallet is for driving the tapping block. It never touches the face of a plank.
Buy about 10% more material than your square footage. You will lose some to cuts, some to a bad plank, and you want spare boxes years from now when a line gets discontinued.
Does laminate flooring need to acclimate?
It depends on your product, and the brands split. Pergo’s installation guide wants at least 48 hours, and 96 hours in a very dry or very humid climate. Shaw’s laminate installation page says no acclimation is required at all, as long as the room is climate controlled before and during the install. Mohawk, Quick-Step, and Pergo Pro all print the same escape clause: if there is no time to acclimate, the space the planks were stored in and the room they are going into have to be within 25 degrees and 20% relative humidity of each other. Bruce says acclimation isn’t necessary but wants the central heat or air running for 14 days before you start.
The 25 degree rule is the one that bites
We used to print that tolerance as 60 degrees. It is not, the RevWood Plus installation instructions put it at 25, and the mistake ran in the direction that wrecks floors. Carry planks from a 30 degree garage into a 75 degree room and the two spaces sit 45 degrees apart, sailing straight past the real limit. Those planks warm up and grow after you have already locked them together, and by then the floor has nowhere to put the extra length. Take a reading in both spaces before you decide to skip acclimation.
The room matters more than the boxes, and even here the sheets do not line up. Pergo, Mohawk, and Quick-Step want 60 to 85 degrees and 35% to 65% relative humidity. Shaw wants 65 to 85 degrees. Bruce wants 30% to 50% humidity, which does not overlap the top half of what everyone else allows. A Bruce floor held at 60% sits inside the range you will read on most websites and outside the range Bruce actually prints. There is no safe consensus number to give you here, which is the whole problem with this topic.
What you can install laminate over
Laminate floats, meaning it isn’t nailed or glued to anything. That’s why it can go over a lot of surfaces, and also why it copies every flaw underneath it.
Over concrete
You need a vapor barrier: 6 mil polyethylene film, virgin (not recycled), with seams overlapped at least 8 inches. Pergo, Mohawk, and Quick-Step all print that spec. We used to tell you Bruce printed it too, and it does not. Bruce asks only for a 6 mil polyethylene vapor barrier where the underlayment is not already a moisture barrier, and says nothing about virgin resin or seam overlap. Shaw asks for a 6 to 8 inch overlap. Skip the barrier only if your plank’s attached pad is itself rated as a moisture barrier.
Test the slab first. Bruce allows moisture transfer up to 3 pounds over 24 hours across 1,000 square feet by the calcium chloride test. Mohawk RevWood’s installation instructions allow up to 5, or under 80% relative humidity on an in-situ probe. Different numbers again, same lesson: get an actual reading. Bruce says it plainly in its own document, that visual checks may not be reliable. A slab that looks dry can still ruin the floor.
Over tile, vinyl, and wood
The laminate trade association lists ceramic tile, luxury vinyl tile in flat good condition, sheet vinyl and linoleum, stable flat hardwood, and plywood or OSB as acceptable surfaces to float over. Flat is the operative word in every one of those.
What you cannot install over
- Carpet of any kind. It has to come out, pad and tack strips included. This is the one every brand agrees on.
- Existing laminate, and bamboo (the laminate trade association names both)
- Brick, for the same flatness and moisture reasons
- Cushion-backed vinyl. Bruce lists it by name.
Do you really need underlayment for laminate flooring?
If your planks have a pad already attached to the back, no. Adding a second layer of foam under an attached pad makes the floor too soft, which flexes the joints and wears them out. If the planks are bare, you need one layer of underlayment. Over concrete you still need the vapor barrier described above, whether or not there’s a pad.
Subfloor flatness is the step people skip
Most laminate makers print the same figure in their install sheets: 3/16 inch over 10 feet. Bruce and Shaw add a tighter one, 1/8 inch over 6 feet, while Mohawk and Quick-Step print only the 10 foot number. There is no single association standard behind any of it, so check the sheet that came with yours. Lay your straightedge down in several directions and look for daylight underneath it.
Here’s a detail worth understanding. Nailed-down solid hardwood is allowed a looser tolerance, because the nails physically pull each board down into plane. Laminate floats, so there is nothing pulling it flat. Every hump and dip gets telegraphed straight into the click joints, and the joints are what fail. Grind the high spots down and fill the low ones, then measure again. If yours is out of tolerance, our guide to levelling a subfloor walks through grinding, patching, and pouring self-leveller without wrecking the floor above it.
The expansion gap, and why floors buckle
A laminate floor grows and shrinks with the seasons. The gap you leave around the entire perimeter is the room it needs to do that. Set your spacers against every wall, cabinet toe kick, pipe, and door casing before you start, and pull them only after the last row is in.
When there’s no gap, the floor keeps growing until it jams against the wall, and the only direction left to it is up. That is the peaking and buckling you see in every sad photo on the flooring forums. It usually shows up in the first season change, long after the installer has gone. If your floor is already down and already doing this, it is often fixable, and we walk through why a laminate floor buckles and what saves it on its own page.
Big rooms need a break in the middle
A perimeter gap alone isn’t enough once a run gets long. Forty feet is the common trigger: Quick-Step, Pergo, and Shaw all want a break once a room hits 40 feet in either direction. Mohawk RevWood stretches it to 50 feet, and separately wants a T-molding in any doorway under 32 inches, or wherever the planks change direction through a doorway whatever its width. Bruce waits until 60 feet before asking for extra expansion. So the brands that stand out are the ones giving you more room than the pack, not less. Running one continuous floor through a whole house with no break at the doorways is a classic way a DIY job goes wrong.
Which direction to lay laminate flooring
Mostly, it’s your call, and it’s worth knowing that because the internet states it as law. Shaw says so directly: the direction is purely a personal choice. People commonly run planks in the same direction as the light from the main window, or parallel to the longest wall to stretch the room out. Both are looks, not engineering.
Bruce does tell you to run perpendicular to the floor joists, which is a rule inherited from nail-down hardwood. For a floating floor nobody publishes a structural reason for it. Starting along the longest wall is genuinely practical though, since it gives you the straightest reference line to work from.
How to start laying laminate flooring
Do the math before you cut anything. Measure the room across the direction the planks will run, divide by the plank width, and look at what the leftover would be. If the last row lands as a skinny sliver, take that width and split the difference with the first row so both ends look deliberate.
How skinny is too skinny? Home Depot’s guide says rebalance if the last row would come in under 3 1/2 inches. Bruce’s own sheet just says keep the first and last rows at least 2 1/2 inches wide. Either way, decide now and not when you’re four hours in.
Also check the piece that starts each row. Quick-Step and Pergo Pro want that first piece at least 8 inches long. Bruce goes further and wants every plank at least 12 inches. A stubby piece has almost no locking strength and it will separate.
How to stagger laminate flooring
Stagger means the end joints of one row sit well away from the end joints in the rows beside it. Do it right and the floor spreads load and movement across the whole field. Do it wrong and stress piles up along a line.
Use your brand’s minimum: 6 inches for Mohawk RevWood, and 12 for Quick-Step and Pergo Pro, and 12 to 16 for Shaw. Watch which Pergo document you have, because the Installation Essentials guide that comes with Pergo and Outlast Plus prints no stagger minimum at all, while the Pergo Pro sheet asks for 12 inches.
You’ll also hear a “one-third of a plank” rule. We previously told you it appears in no manufacturer sheet anywhere. That was wrong, and Shaw’s own instructions say to cut a board into one third, one half, or two thirds lengths to keep the stagger random. What it is not is a minimum. Use it as a way to vary your cuts, and use your brand’s published offset as the number that actually has to be met.
What to avoid has a name. When end joints in every other row line up, you get repeating H shapes across the floor. When they march diagonally in a tight, even staircase, installers call it a lightning bolt. Both concentrate stress at the joints and both look obviously wrong once someone points them out. Pull planks randomly from three or four different boxes as you go and the pattern takes care of itself.
Door jambs, doorways, and transitions
Undercut the door casing and slide the flooring under it. Don’t scribe the plank around the casing. Cutting the plank tight to the trim pins the floor exactly where it most needs to move, and that corner is where the peaking starts.
The clearance numbers differ again, of course. Bruce wants 1/16 inch of clearance under the casing so the floor can float without anything pressing down on it. The Mohawk and Quick-Step sheets have you slide the plank about 1/4 inch under the frame with the full expansion space hidden beneath.
For the last row, or any plank that has to go under a jamb where you can’t tilt it up to click it, you have two options. Slide it in flat and close the long joint first with a pull bar, or shave down the locking lip with a block plane so the plank slips under. Around a pipe, click the two planks together at the joint where the pipe lands, then drill a hole centered on that seam about 3/4 inch wider than the pipe.
At a toilet, pull the toilet. Don’t cut around it. Leave a 1/4 inch gap out to the flange and seal it with 100% silicone.
Common mistakes when laying laminate flooring
- No expansion gap, or spacers pulled early: the floor peaks in the first humid month
- Trusting your eyes on a concrete slab instead of taking a moisture reading
- Installing over a subfloor that’s out of flat, then blaming the planks when joints separate
- Whacking the plank face with a mallet and burning the finish
- Running one uninterrupted floor through the whole house with no T-molding at the doorways
- A crooked first row, which quietly ruins every row after it
- Skipping the underlayment, or doubling it up under planks that already have a pad
- Baseboard nailed down into the floor instead of into the wall, which pins it in place
Where DIY stops
We would rather you finish this floor than start it twice. Four situations are where a confident DIYer should get a second opinion before buying material:
- A subfloor that’s badly out of flat, or that flexes underfoot
- Any concrete slab, especially below grade, where the moisture reading is near the limit
- Stairs, which are fastened rather than floating and are a genuinely different job
- Radiant heat below, where the slab surface temperature has to stay under about 85 degrees and be raised slowly
Not one of them says you can’t lay the floor. Each just puts the answer somewhere the plank’s instruction sheet won’t take you, and a bad guess costs more than a question.
Talk to a floor installer before you open the boxes
Send photos of your subfloor, your slab reading, or the instruction sheet you can’t make sense of. A working installer we’ve vetted will tell you whether you’re clear to lay it yourself, and exactly what to fix first if you aren’t. They don’t want the job, so the answer is just the answer.
Good fit: a Video Call to walk the room together, or a Project Shadow if you want someone on call while you work.
Get an unbiased expert reviewFrequently asked questions
- Can a beginner install laminate flooring?
- Usually, yes. The click-lock joint is forgiving and a careful first-timer does fine in a standard room. The difficulty isn’t the planks, it’s the prep: flattening the subfloor to within 3/16 inch over any 10 foot stretch, testing a concrete slab for moisture, and holding an expansion gap all the way around. Lowe’s own installation video rates the job moderate and suggests hiring out if you aren’t confident.
- What are the biggest laminate flooring mistakes?
- Leaving no expansion gap, which makes the floor peak and buckle at the first season change. Installing over a subfloor that isn’t flat, which stresses the locking joints until they separate. Skipping a moisture test on concrete. Striking the plank face with a rubber mallet, which can burn the finish. And running one continuous floor through a whole house with no transition molding at the doorways.
- What is the minimum expansion gap for laminate flooring?
- There is no single answer, which is why so much advice on this conflicts. Bruce and Hartco call for 1/4 inch. Pergo, Mohawk RevWood Plus, Quick-Step, and Swiss Krono all call for 3/8 inch. Shaw is the strange one: its general laminate page says 1/2 inch while its glueless laminate sheet says 1/4 inch, so one brand spans the entire industry range on its own. Use the number in your product’s installation instructions, because that is the number your warranty is measured against.
- What happens if you don’t use underlayment under laminate flooring?
- On bare planks, you get a floor that is noisy underfoot and locking joints that take the full punishment of every dip in the subfloor, because the underlayment is what lets the floor sit and move evenly. But the reverse mistake is just as common. If your planks already have a pad attached to the back, adding a layer under them makes the floor too spongy and works those same joints loose. One layer or none, depending on the plank. Separately, laminate over concrete needs a 6 mil polyethylene vapor barrier no matter what, unless the attached pad is itself rated as a moisture barrier.
- How long should I let laminate flooring acclimate?
- It depends on the brand, and they split. Pergo requires at least 48 hours, and 96 hours in a very dry or very humid climate. Shaw says no acclimation is needed at all if the room is climate controlled before and during the install. Mohawk, Quick-Step, and Pergo Pro all allow you to skip it only if the storage space and the install room are within 25 degrees and 20% relative humidity of each other. That 25 degree figure is the one people get wrong, and a cold garage will blow past it easily. Bruce says acclimation is unnecessary but wants the heat or air running for 14 days first.
- How do you stagger laminate flooring for beginners?
- Keep the end joints of neighboring rows well apart, using your brand’s minimum: 6 inches for Mohawk RevWood, 12 for Quick-Step and Pergo Pro, and 12 to 16 for Shaw. Bruce says 12 in its floating section and 16 in its glue-down section, so read the one that matches your install. Start each new row with a different offcut length so joints never line up, and pull planks from three or four open boxes at once. Avoid repeating H shapes where joints align every other row, and avoid an even diagonal staircase of joints.
- Does it matter which direction laminate flooring is laid?
- For a floating floor, direction is a design decision, not a structural one. Shaw states outright that it’s purely a personal choice. Running planks with the light from the main window, or parallel to the longest wall to make a room feel longer, are both common. Starting along the longest wall is practical, since it gives you the straightest line to build off. Bruce does recommend running perpendicular to the joists, a convention carried over from nail-down hardwood.