How to Install Vinyl Siding
Published by TradeIQ · Updated
Vinyl is an obvious candidate for doing yourself, and the panels really are beginner-friendly: light, cut with tin snips, click together. But to install vinyl siding so it lasts, you have to fight the instinct that ruins most DIY jobs. You do not nail this stuff tight. The Vinyl Siding Institute puts the reason in one sentence: vinyl siding can expand and contract half an inch or more over a 12 foot 6 inch length during normal, year-round changes in temperature. It is quietly getting longer and shorter all day. Everything below serves that one fact.
Key takeaways
- Two different triggers: pre-1978 means lead paint, and a hard, cementy old board means possible asbestos-cement whatever the year. Settle both before you pull anything, and leave the sampling to an accredited pro. Federal law mostly does not make you, which is exactly the problem.
- Vinyl moves half an inch or more over a 12 foot 6 inch run with the seasons. The whole method is about letting it slide.
- Leave a dime's thickness under each nail head, nail the center of the slot, and check that the panel slides freely. Freely is the standard, not a distance.
- What the 1-1/4 inch fastener rule means depends on your sheathing: combined into sheathing and framing over wood, but a full 1-1/4 inches into framing over fiberboard or gypsum. Same in the 2018 and 2021 code. A short nail only fails in a storm.
- The house wrap, not the vinyl, is your waterproofing, and the code has required it in both the 2018 and 2021 editions. Flash shingle-style so water sheds out.
- Never caulk the J-channels or weep holes shut. They are the wall's drainage path.
Two things worth knowing before you buy anything. First, these are not just tips. The residential code, in the 2018 and 2021 editions alike, says vinyl siding shall be installed in accordance with the manufacturer's instructions, which turns whatever came in your panel maker's box into something an inspector can hold you to. VSI's installation manual, the source of the expansion figure above and of most of the rules below, says the same about itself: specific products may differ from it, and the manufacturer's instructions win. Second, the code carries its own default numbers underneath all that, and one of them is the number homeowners most often get wrong.
Before you pull a single board: how old is the house?
Most vinyl guides start at the wall. Start one step earlier, because the mistake available here is the kind that does not show up for thirty years.
Houses finished before 1978 should be treated as having lead in the old paint until a test says otherwise. And if the old siding itself is a hard, brittle, cementy shingle, it could be asbestos-cement. You cannot settle that by eye, EPA says taking the sample yourself is not recommended, and the answer decides whether the tear-off below is a job you can do at all. Our guide to cutting fiber cement safely covers how to tell the two apart, why sawing is the worst move available to you, and who to call if it comes back positive. Settle that question before you pull anything off this wall.
There is a gap in the rules here, and you should know about it before you start. EPA's lead rule, the one that forces contractors into containment and certified crews, applies to renovations performed for compensation, and EPA's renovation program page says it generally does not reach a homeowner working on their own pre-1978 home. Read that "generally" closely, because EPA names three exceptions in the same breath: it does apply if you rent out all or part of the house, run a childcare center in it, or are fixing it up to sell. The federal asbestos rule excludes residential buildings with four or fewer dwelling units. And on accreditation, EPA's homeowner guidance is blunt: federal law does not require people who inspect, repair or remove asbestos-containing materials in detached single-family homes to be trained and accredited, though it adds that some states and localities do. If none of those exceptions is you, most of the federal machinery built to keep this dust out of a child's lungs simply steps around you.
The dust does not know that. So do it in this order: find the build year, and if it is pre-1978 or the old siding is cementitious, have an accredited inspector test it before you touch it. Then call your state or regional air agency, because some states and localities require more than the federal rules do. Going over sound old siding rather than tearing it off does cut the disturbance a long way and is worth pricing, but do not let anyone tell you it makes the question disappear: you still drive several hundred fasteners through that board. VSI is direct about that case, saying asbestos siding is a regulated material and that you should contact the appropriate environmental agency or building code official before re-siding over it. Make that call first. And if it does have to come off, EPA's handling rules come down to one idea: nothing that makes dust, and nothing that stirs up what has already fallen. Our fiber cement page sets them out in EPA's own words.
Is vinyl siding difficult to install yourself?
For a single-story house with simple walls, a careful first-timer can do it. Clicking panels together and cutting them is the easy part. The parts that take real attention are getting the starter strip dead level, flashing the windows and rooflines so water sheds outward, and fastening every panel loose enough to move.
Where it stops being a weekend project is height and water. Anything needing scaffolding above the first floor, a wall with rot under the old siding, or a tricky roof-to-wall junction is where mistakes get expensive and, up a ladder, dangerous.
The rule that makes or breaks the job: do not nail tight
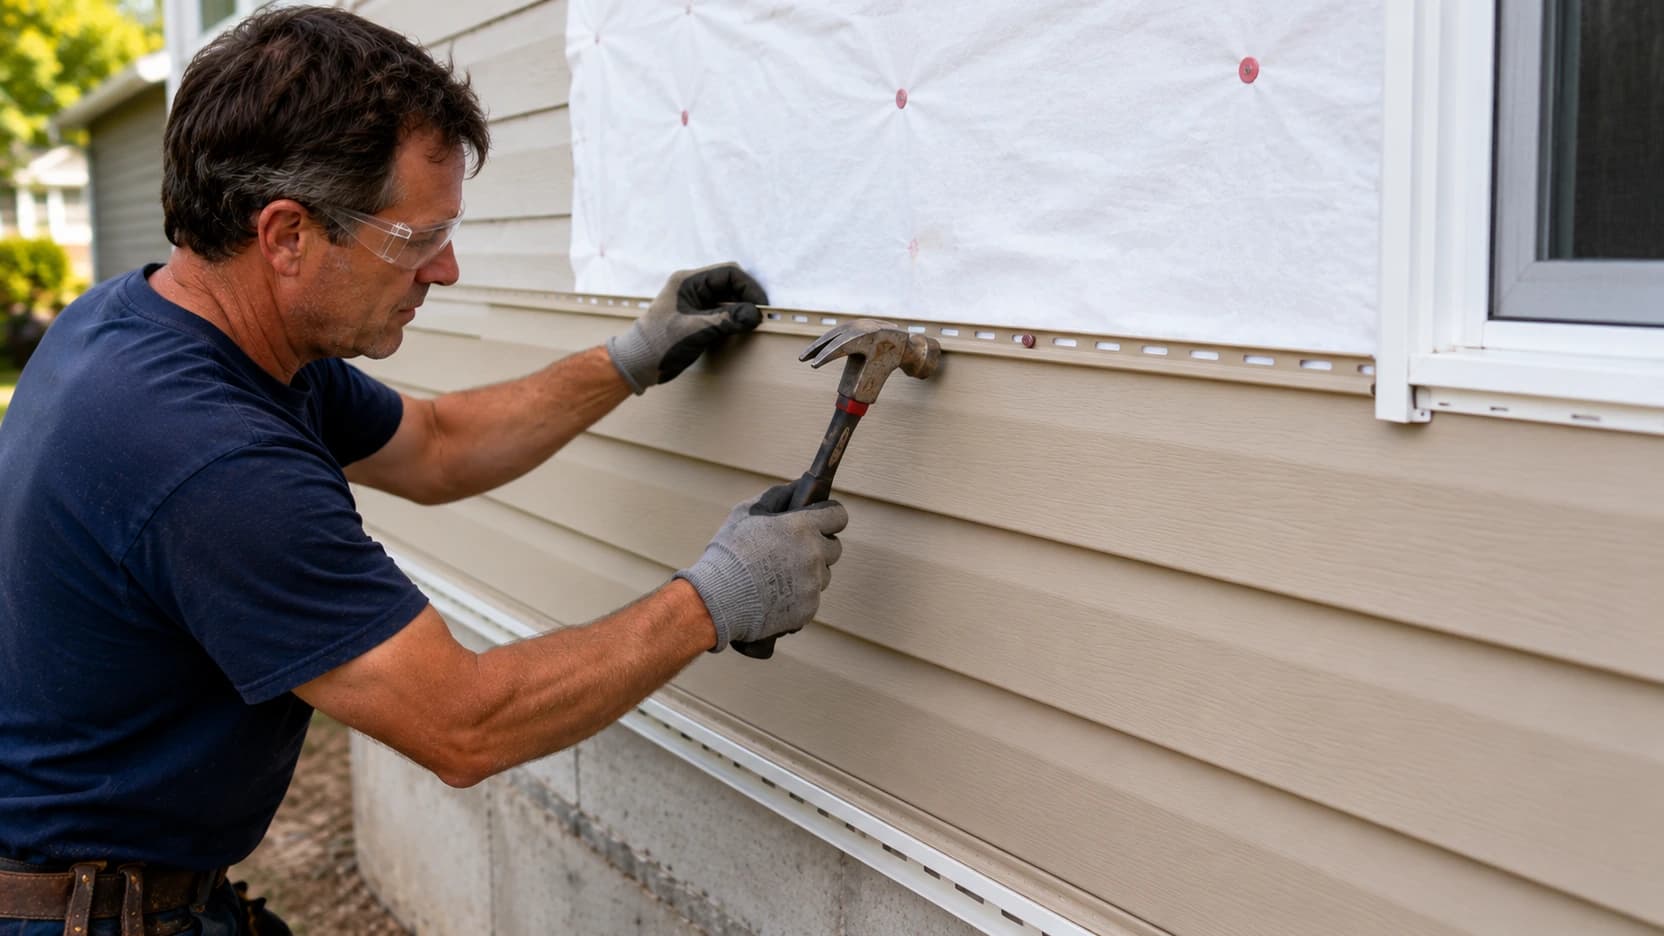
VSI puts this near the top of its fastening procedure, and it is the one to hold on to. Drive each nail until the head is close to the panel, then stop, leaving about the thickness of a dime, roughly 1/32 inch, between the head and the nailing strip. Your panel maker may allow more play than that, and the code defers to whatever its instructions say, so read the box before you settle on the dime. The panel should hang from its nails, not be pinned by them.
- Leave a dime's thickness under every nail head. VSI says fastening tight is what makes vinyl buckle as the temperature changes.
- Nail in the center of each slot, not the end, so the panel can slide both ways as it moves.
- Drive nails straight and level, not at an angle, or the panel distorts.
- Space fasteners no more than 16 inches apart on horizontal panels, every 12 inches on vertical panels, and every 8 to 12 inches on accessories and trim, unless your manufacturer's wind-load testing allows wider, which both VSI and the code let it do. Start in the center of a panel and work out toward the ends.
- Never face-nail through the front of a panel except in the very limited cases VSI allows for. The gable peak is the one you are most likely to meet: the last panel there takes a trim nail, and VSI calls that one of the few times a nail belongs in the face of the siding.
Want to check your own work? After nailing a course, grab the bottom edge and try to slide it sideways. The test is pass or fail, not a measurement: VSI says installed panels must move freely from side to side. If it is locked solid, your nails are too tight, and it is worth pulling them now rather than watching the wall ripple all summer. Do not chase a specific distance of travel and keep backing nails out to get it. Loose enough to slide is the whole standard, and backing a nail too far out is its own mistake.
The fastener spec, which is where the code actually bites
This is the number people get wrong most often, and what it means depends on what is behind your siding. The residential code's wall covering chapter splits it three ways. Over wood or wood structural panel sheathing, a fastener has to reach 1-1/4 inches into sheathing and framing combined. Over fiberboard or gypsum sheathing, it has to reach 1-1/4 inches into the framing itself, which is a longer nail than most people pick up. Over foam plastic sheathing it hands you to a separate section and to your manufacturer's instructions. The wording is identical in the 2018 and 2021 editions, so it holds whichever your town has adopted. Work out which of the three is on your wall before you buy nails. VSI wants a head at least 5/16 inch across on a 1/8 inch shank so the nail cannot pull through the slot, and a roofing nail is the easy way to get a head that wide. If you use screws, VSI asks for a #8 truss-head or pan-head reaching 1-1/4 inches into framing or furring, which is a deeper bite than the nail rule asks for.
It matters more than it sounds. A short fastener does not show up on install day, or on a still afternoon, or the first year. It shows up when a storm gets under the panel, and by then the wall is off.
Tools, fasteners, and the one that can hurt you
- Aviation snips and a utility knife for cutting
- A snap-lock punch, which raises tabs on a cut top edge so the finish course locks into utility trim
- A nail-slot punch, to extend or add a nailing slot in a cut panel
- An unlocking (zip) tool for unhooking a panel from the course below
- A 4 foot level, a chalk line, a tape, and a framing square
- Corrosion-resistant fasteners: aluminum, galvanized steel, or stainless. Aluminum trim needs aluminum or stainless specifically.
And the circular saw, which comes with a warning attached to it. VSI does tell you to install a fine-tooth plywood blade backward on the saw, for a smoother, cleaner cut, especially in cold weather. But it attaches conditions, and here they are in its own words: "Cut slowly. Do not attempt to cut materials other than vinyl with a reversed direction saw blade." It follows that with a caution that use of a backwards blade on any other materials could be unsafe. Wear eye protection too. VSI says protective eyewear is always recommended for all cutting and nailing operations, and this is a page that just told you to run a blade the wrong way round.
Start with the wall, not the siding
Before a panel goes up, the wall has to be sound and flat. VSI is direct about it: a flat, level wall surface is necessary, you should check all walls for evenness and install furring strips where needed, and you must not install vinyl siding over rotting wood. A wavy wall telegraphs through the panels forever, and no amount of careful nailing hides it.
Then the whole wall gets house wrap, the water-resistive barrier, laid over the sheathing before any trim or siding goes up. House wrap is not a nice-to-have, it is code: the residential code, 2018 and 2021 alike, wants at least one layer of that barrier over the studs or sheathing of every exterior wall. The wrap is your real waterproofing. The vinyl over it is a rain screen that takes the beating; water that slips past it rides down the wrap and back out.
Flashing comes next, and the golden rule is that every layer laps over the one below it like shingles, so water always travels down and out, never in. At windows and doors, tuck flashing under the wrap at the top and lap it over the siding below. Where a roof edge dies into a sidewall, you need kickout flashing, the angled diverter that throws roof runoff into the gutter instead of behind your panels. Plan it before you side over it, and if you are hiring any part of this out, know that whose job the kickout is turns out to be a real argument.
The starter strip sets the whole wall
Every course follows the starter strip, so if the starter is off, the wall leans a little more with every row until it is visibly crooked at the top. Be fussy here.
Find the lowest corner of the wall. Measure up a distance a quarter inch less than the width of your starter strip, mark it, and snap a level chalk line around the house. Nail the strip along the line every 8 to 12 inches, and leave about a quarter inch between the ends of neighboring strips so they can expand. Keep the starter back from any head flashing so you do not block the weep holes that let the wall drain.
Corner posts, then J-channel
Install the corner posts next, then run J-channel around windows, doors, and rooflines. A corner post hangs from two nails, one at the top of the upper slot on each side, and every nail below floats loose in the center of its slot so the post can grow downward without buckling. Leave about a quarter inch between the top of the post and the eave, and run the post about 3/4 inch below the starter strip.
Two things people get wrong. Drill weep holes at least 3/16 inch across, no more than 24 inches apart, in the bottom of the J-channel, so trapped water can escape. And do not caulk the channels shut. It is tempting to seal every joint, but the open channels and weep holes are the drainage path. Caulk them and you trap water in the wall, which is the exact opposite of the point.
Hang the first course, then work up
Lock the bottom edge of the first panel into the starter strip until it snaps, then nail the top flange, loose and centered, starting in the middle and working out. Do not pull up hard on a panel while you nail it. VSI's rule is that a panel should not be under tension or compression once it is fastened, and forcing one up distorts it. Click it in and let it rest.
Leave room at the ends. Where a panel meets a corner post or J-channel, leave a 1/4 inch gap for expansion, or 3/8 inch if you are working below 40 degrees, because the panel is at its shortest in the cold and will grow. Overlap panel ends by about an inch, and point the laps away from the front door and the way you walk up, so the seams are hard to see. Stagger the seams so no two courses line up unless they are separated by at least three courses, and avoid starting or ending a course with a piece shorter than 24 inches. Check horizontal alignment every fifth or sixth course, and against the adjoining walls, before the error has anywhere to hide.
Fitting a course under a window, and cutting the gable angle
Two cuts catch first-timers, and both are template jobs rather than tape-measure jobs. A panel under a window loses its top lock when you cut it down, so it needs the same snap-lock-and-utility-trim treatment as the final course under the eave. VSI's method for the horizontal cut is to build a template rather than trust a measurement.
- 1Hold the panel up under the window and mark the width of the opening on it, then add about a quarter inch to each side for expansion. Those are your vertical cuts.
- 2Lock a scrap piece of siding into the course below, beside the window, and mark it a quarter inch below the sill height. That scrap is your template for the horizontal cut, and it earns its keep because the measurement is often not the same on both sides of the window.
- 3Transfer that mark to the real panel, cut it with tin snips and a utility knife, then run the snap-lock punch along the cut edge every 6 inches with the raised lugs facing outward.
- 4Nail utility trim under the window and push the panel up into it until the lugs catch, so it holds with no face nail showing.
The gable is the same trick turned on its side. Lock a short piece of siding into the last course before the gable starts, hold a second piece against the J-channel along the slope, and mark that angle onto the short piece. Cut it, and you have a pattern for every angled cut up that side. Make a second one for the other side, because the two are mirror images and not interchangeable, and hold the pattern against the J-channel every few courses. An angle that is off by a degree compounds the whole way to the peak.
Faucets, lights, and anything you hang on the wall
This is the step that catches people on wall one, and it follows straight from the loose-nail rule. Anything you fasten through vinyl has to let the vinyl move behind it. For a hose bib, a railing bracket, or a light, use a two-piece mounting block made for the job. Where you must run a fastener through a panel, drill the hole a quarter inch larger than the fastener's shank so the panel can slide around it. Same for shutters: oversize the hole, and never draw the shutter down tight against the siding. Pin a panel with one screw and the whole course will buckle, and you will spend a weekend hunting for a cause that is a shutter.
Finishing the top course
The last course under the eave usually has to be cut down in width, which removes its nailing strip. That is what the snap-lock punch is for: run it along the cut edge to raise tabs every 6 inches, then lock those tabs into a length of utility trim nailed up under the soffit. The panel snaps in and holds with no face nail showing. Measure the gap in several places first, since an eave line is rarely even.
Common vinyl siding mistakes
- Ripping into old siding without testing it. Pre-1978 means lead; a hard, cementy board means possible asbestos at any age. The only mistake on this list you cannot fix by redoing the wall.
- Nailing tight, so the wall buckles and waves the first hot afternoon
- Fastening short. What the 1-1/4 inches has to reach depends on your sheathing, and a short nail only fails in a storm.
- A starter strip that is not level, which throws off every course above it
- No expansion gap at the corner posts and channels, so panels warp in the heat
- Caulking the J-channels and weep holes shut, trapping water in the wall
- Reusing torn old house wrap, or skipping the wrap, and counting on vinyl alone to keep water out
- Screwing a shutter or a light tight to the panel, which pins the course and buckles it
When to hand it to a pro
- Old siding that tests positive for lead or asbestos. That is an abatement job before it is a siding job.
- Two-story walls or anything needing scaffolding, where a fall is the real risk, not a crooked panel
- Soft or rotted sheathing found after the old siding comes off, which is a repair job before it is a siding job
- Complicated rooflines, dormers, and chimney tie-ins, where one missed flashing lap leaks for years before it shows
Not sure you want to solo the whole wall?
It is not all-or-nothing between doing the house yourself and hiring it out. A career siding installer can jump on a video call and walk your first corner and first course with you, or stay reachable as you go so the flashing detail is not a guess. The useful thing is having someone to ask at the moment you are standing there holding the panel.
Get a siding pro on the line before your first course
Send photos of your wall, the flashing detail that has you stuck, or the corner you cannot picture, and a vetted veteran installer will say straight out if you are good to hang it yourself, and what to sort out first if you are not. There is no job here for them to win, so you get the honest read.
Try a Video Call to look over your wall live, or a Project Shadow so a pro rides along while you work.
Get an unbiased expert reviewFrequently asked questions
- What is a common mistake to avoid during vinyl siding installation?
- Nailing the panels tight. Vinyl expands and contracts a lot with temperature, so pinning it down makes the wall buckle and wave the first hot day. Leave about a dime's thickness under every nail head, nail in the center of the slot so the panel can slide, and after a course is up, tug it sideways to confirm it still moves freely. The close second is nailing short: the code asks for 1-1/4 inches, measured into sheathing and framing combined over wood sheathing but into the framing alone over fiberboard or gypsum, and a shallow nail holds fine until the first real wind.
- Do you screw or nail vinyl siding?
- Nails are standard and quicker, but screws work too, especially on trim and accessories you may want to reposition. Either way, use a corrosion-resistant fastener (aluminum, galvanized, or stainless), give it the penetration the code asks for, and back it off so the panel can still slide side to side. VSI says screws should be a #8 truss-head or pan-head reaching 1-1/4 inches into framing or furring. The play matters far more than which fastener you picked.
- Do I need a vapor barrier under vinyl siding?
- You need a water-resistive barrier, the house wrap, over the sheathing before the siding goes on, and the residential code requires it on exterior walls in both the 2018 and 2021 editions. Its job is to shed water that gets past the panels and let the wall dry. That is a different thing from an interior vapor barrier, which is about indoor humidity and is a separate wall-assembly decision that depends on your climate. People conflate the two and skip the one that matters. For the outside of the wall, the house wrap is what keeps your sheathing dry.
- Should vinyl siding go all the way to the ground?
- No, but the number that binds you is your panel maker's, not a figure from the code. The residential code, in both the 2018 and 2021 editions, sets no ground clearance for vinyl siding specifically. What it does instead is require that vinyl be installed to the manufacturer's instructions, which turns whatever clearance your maker publishes into the one an inspector can hold you to, so look it up before you set the starter strip. There is one published gap worth knowing on top of that: VSI wants J-channel kept at least 1/2 inch off the roofing material, because heat coming off shingles distorts vinyl. And keep the siding up out of the dirt regardless. Siding buried in soil wicks moisture, invites rot in the framing behind it, and gives termites a hidden path up the wall.